搭建数据工作者的blog
作为一个天天和数据打交道的人,没有一个高大上的博客是说不过去的,市面上的各种博客主要是适合文字工作者,作为一个数据工作者,首先博客要支持各种数学公式和图形,ipython notebook也是必须的,其次博客要能用markdown来写,支持Git进行版本控制。因为一直用Python,综合考虑下来,圈定Github Pages + Pelican。 Github是全球最大的同性交友社区,支持静态页面,用Git进行版本控制。Git就不在这里多说了,不懂的推荐廖雪峰Git教程。Pelican是Python写的静态网站生成器,支持众多的扩展和主题,包括我们下面用到的ipython-notebook和mathjax插件。
首先安装Pelican环境
1、安装Python和Pip环境
搞数据的大多都使用anaconda的python发行版,下载对应平台的anaconda包,并安装
2、安装pelican并初始化
pip install pelican
初始化 pelican
~$ mkdir cd /path/to/blog
~$ cd /path/to/blog
$ pelican-quickstart
Welcome to pelican-quickstart v3.7.1.

This script will help you create a new Pelican-based website.

Please answer the following questions so this script can generate the files
needed by Pelican.


> Where do you want to create your new web site? [.]
> What will be the title of this web site? My Blog
> Who will be the author of this web site? Yuk Wong
> What will be the default language of this web site? [en]
> Do you want to specify a URL prefix? e.g., http://example.com   (Y/n) n
> Do you want to enable article pagination? (Y/n)
> How many articles per page do you want? [10]
> What is your time zone? [Europe/Paris] Asia/ShangHai
> Do you want to generate a Fabfile/Makefile to automate generation and publishing? (Y/n)
> Do you want an auto-reload & simpleHTTP script to assist with theme and site development? (Y/n)
> Do you want to upload your website using FTP? (y/N)
> Do you want to upload your website using SSH? (y/N)
> Do you want to upload your website using Dropbox? (y/N)
> Do you want to upload your website using S3? (y/N)
> Do you want to upload your website using Rackspace Cloud Files? (y/N)
> Do you want to upload your website using GitHub Pages? (y/N) y
> Is this your personal page (username.github.io)? (y/N)
Done. Your new project is available at /path/to/blog
目录结构
$ mkdir plugins themes
$ tree
.
├── content              # 写的文章放这里
├── output               # 生成的输出文件(发布的内容,静态html)
├── plugins              # 存放官方和第三方的plugin
├── themes              # 存放官方和第三方主题
├── develop_server.sh    # 测试http服务器启停脚本
├── fabfile.py            # 远程应用部署和系统管理工具
├── Makefile             # 方便管理博客的Makefile
├── pelicanconf.py   # 主配置文件
└── publishconf.py   # 发布配置,默认包含住配置
2 directories, 5 files
编辑一篇测试文档
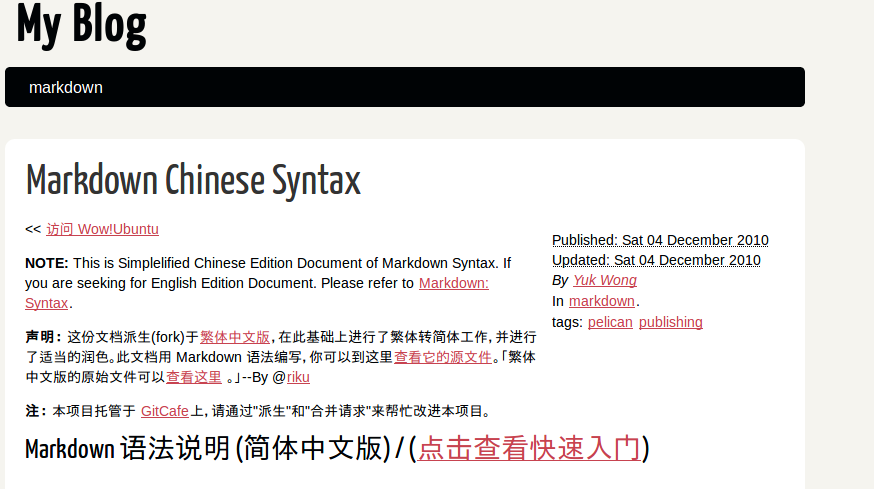
从这里复制一份简体中文Markdown示例文档,保存在content目录,并在文本开头添加上Pelican的元数据
$ cd content
$ wget -c 'https://coding.net/u/php/p/Markdown/git/raw/master/syntax.md'
$ vi syntax.md
Title: Markdown Chinese Syntax
Date: 2010-12-04 10:20
Modified: 2010-12-04 19:30
Category: markdown
Tags: pelican, publishing
Slug: md-cn-syntax
Authors: Yuk Wong
Summary: Chinese version for Markdown Syntax


<< [访问 Wow!Ubuntu](http://wowubuntu.com)

**NOTE:** This is Simplelified  Chinese Edition Document of Markdown Syntax. If you are seeking for English Edition Document. Please refer to [Markdown: Syntax][eng-doc].

[eng-doc]:http://daringfireball.net/projects/markdown/syntax

**声明:** 这份文档派生(fork)于[繁体中文版](http://markdown.tw/),在此基础上进行了繁体转简体工作,并进行了适当的润色。此文档用 Markdown 语法编写,你可以到这里[查看它的源文件][src1]。「繁体中文版的原始文件可以[查看这里][src] 。」--By @[riku][t]

**注:** 本项目托管于 [GitCafe][]上,请通过"派生"和"合并请求"来帮忙改进本项目。
生成html并测试
$ make html serve
pelican /path/to/blog/content -o /path/to/blog/output -s /path/to/blog/pelicanconf.py
Done: Processed 1 article, 0 drafts, 0 pages and 0 hidden pages in 0.65 seconds.
cd /path/to/blog/output && python3 -m pelican.server
浏览器打开http://localhost:8000
创建Github Pages
Github Pages 可以方便Github用户或者项目快速部署静态网站,Github Pages有两种方式 一种是用户的对应域名是http://username.github.io 一种是项目的对应域名是http://username.github.io/repository
这里我们主要介绍用户页面,设置步骤如下
注册一个Github帐号,有的请忽略
建立一个名叫username.github.io的仓库, username就是你注册的用户名Here’s a more detailed guide on how to do this.
进入到刚才创建的blog目录, 初始化git项目,并添加远程仓库
bash
    git init
    git remote add origin git@github.com:username/username.github.io.git
    # 把 **username** 换成你注册的用户名
Github Page会把仓库中master分支上的html显示在 https://username.github.io上
博客的分支规划
因为静态页面的发布只能通过项目的master分支,所以需要对分支进行简单规划一下:
- master分支 发布分支(github强制),因为使用make github(内部使用ghp-import)发布,每次发布会删除重建此分支,所有手工编辑文件会被删除, 所以不能用此分支来进行文章编辑。注意要手工修改Makefile的GITHUB_PAGES_BRANCH=gh-pages 为 GITHUB_PAGES_BRANCH=master
- edit分支 是编辑远程主分支,所有文章编辑都merge到此分支, 在次分支通过运行make github会自动的在master分支生成html并把这些静态的html推送到github 的master分支
- e_xxxx 是本地编辑子分支,每次新写文章的分支,写完merge到edit分支后可以删除,一般不推送到远程,这样可以多篇文章同时编辑,单独merge.
- pelican 分支是Pelican配置主分支(远程),纯配置,只含有一两个示例文档,调整配置测试无问题就可以merge到edit分支,同时也可以作为配置分享。
- p_xxxx 配置本地测试子分支,用于测试各种配置、插件和主题,测试稳定后可以合并到pelican分支
代码如下:
git checkout -b pelican
git add content develop_server.sh pelicanconf.py publishconf.py
git commit -m '项目初始化'
git push origin pelican
git checkout -b edit
git push origin edit
make github
这个时候我们可以看看master分支有些什么?
$ git checkout master
$ tree -L 1
.
├── archives.html
├── author
├── authors.html
├── categories.html
├── category
├── feeds
├── index.html
├── md-cn-syntax.html
├── output
├── plugins
├── __pycache__
├── tag
├── tags.html
├── theme
└── themes
全是生成的html,所以再次强调,不要在master进行编辑
插件和主题安装
在添加其他功能之前,建议先fork 官方的plugin和theme,这样对于插件和主题的修改你就可以push回去
git submodule add git@github.com:getpelican/pelican-plugins.git plugins/pelican-plugins #这里添加的官方的插件仓库
在pelicanconf.py中添加
PLUGIN_PATHS = ["plugins/pelican-plugins",]
数学公式的支持
在pelicanconf.py 添加添加
PLUGINS = ["render_math",]
就可以编写公式测试一下了 $E=mc^2$ ,显示 \(E=mc^2\)
jupyter notebook支持
ipynb文件的支持通过pelican-ipynb提供 先安装插件,还是先建议fork到自己用户下,再通过git添加子模块
git submodule add git://github.com/danielfrg/pelican-ipynb.git plugins/ipynb
在pelicanconf.py中修改配置
MARKUP = ('md', 'ipynb')

PLUGIN_PATHS = ["plugins/pelican-plugins",, './plugins']
PLUGINS = ['render_math', 'ipynb.markup']
用法: 把ipynb文件放入content目录下,建立一个新的后缀名为ipynb-meta的文件名,如: my_post.ipynb 则对应的文件为 my_post.ipynb-meta ipynb-meta中编写pelican的metadata文件:
Title: Pandas
Date: 2010-12-04 10:20
Modified: 2010-12-04 19:30
Category: blog
Tags: pandas, ipynb
Slug: pandas-int
Authors: Yuk Wong
运行make html serve 可以查看测试的ipynb文档
主题
主题个有各的口味,我选择niu-x2-sidebar 添加到Blog项目
#添加主题
git submodule add git@github.com:sinoyster/niu-x2-sidebar.git themes/niu-x2-sidebar
#添加自动生成标题的插件,改插件只支持2.7,简单改了一下支持3.x
git submodule add git@github.com:sinoyster/extract_headings.git plugins/extract_headings
修改配置
THEME = 'themes/niu-x2-sidebar'
from  hashlib import md5
def my_slugify(value, sep):
    m = md5(value.encode('UTF-8'))
    #m.update(value.encode("UTF-8"))
    return "toc_{}".format(m.hexdigest())
MY_SLUGIFY_FUNC = my_slugify

JINJA_ENVIRONMENT = {
    'extensions': ['jinja2.ext.ExprStmtExtension',   ],
}

PLUGINS = [
    'gzip_cache',
    'extract_headings',
    'summary',
    'render_math',
    'ipynb.markup',
]
UPDATEDATE_MODE = 'metadata'
重新make测试一下
make html serve
其他配置调整
Markdown编辑器支持
社会化分享
评论
Docker (TODO)
独立域名配置
图片处理
github上传 七牛图床,解决图片上传,返回url的问题